


Projects and files
A project is a set of files kept on your device, one of which is the main file that gets typeset. You can import a whole project at once by opening a .zip or a folder, for example one downloaded from another LaTeX editor.
What a project is
A project holds every file your document needs: .tex sources, a .bib file with your references, images, and data files for plots. Files can live in folders, such as chapters/intro.tex or figures/plot.png.
Projects are saved in your browser's storage on this device, a moment after each change. The Projects panel lists them, newest first, and lets you rename, switch or delete them. Deleting a project here never deletes a copy you saved to Google Drive.
The main file
One .tex file is the main file: the one with \documentclass and \begin{document}. It is the file that gets typeset, and it pulls in the others with \input and \include. The Files panel marks it with main.
To typeset a different file, open its menu in the Files panel and choose Typeset this file, or pick it under Main file.
A main file with a bibliography
\documentclass{article}
\begin{document}
\section{Background}
Long tables are discussed by \cite{mustermann2021}.
\bibliographystyle{plain}
\bibliography{refs}
\end{document}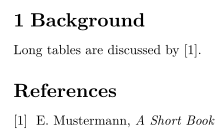
The example above needs a second file, refs.bib, in the same project. Open it in the editor to see both files. More on references in Bibliographies and citations.
Several .tex files
Split a long document into one file per chapter and pull them into the main file. \input{chapters/intro} inserts the file where the command stands; \include{chapters/intro} does the same and starts a new page first. The .tex extension can be left out.
\documentclass{report}
\begin{document}
\include{chapters/intro}
\include{chapters/method}
\input{appendix}
\end{document}
Errors in an included file point to the right file and line in the Problems tab. See Projects with several files for the details, including what happens with \includeonly and the subfiles package.
Adding files
There are several ways to add files to the open project:
- Drop files anywhere on the editor.
- In the Files panel, use Upload for files or Folder for a whole folder from this device.
- Use New file to make an empty file. Type a path such as
chapters/intro.texto put it in a folder. - Use Drive or Drive folder to add files from your Google Drive. See Saving to Google Drive.
If the project already has a file with the same name, the editor asks whether to replace it or keep yours.
The editor accepts .tex, .bib, .sty, .cls, .bst, .txt, .md, .csv and similar text files, images (PNG, JPG, SVG, PDF and a few more) and .zip files, which are unpacked.
Importing a project from a .zip or a folder
Most LaTeX editors and every TeX installation keep a project as a folder. To bring one into Scissor LaTeX:
- Download the project as a
.zipfrom the other editor, or find its folder on your computer. - In Scissor LaTeX, choose New project, then Open .tex or .zip files or Open a folder.
- The editor unpacks it, keeps its folder structure and picks the main file.
When there is more than one complete document, the editor prefers main.tex, then a file named like the folder, then the one with the shortest path. A note tells you which file it chose, and you can change it under Main file.
A folder can hold up to 2,000 files and 100 MB. When a folder is larger, the sources are kept first and the rest is left out and counted.
Files the document needs but the project lacks
After you open or add files, the editor checks what your document refers to: images in \includegraphics, .bib files, files in \input and \include, and data files of plots. If something is missing, the Files panel lists it, with buttons to upload it or add it from Drive. A file you add by its bare name goes where the document expects it, so plot.png lands in figures/ if the document asks for figures/plot.png.
Until then, a missing image is drawn as a dashed box with its name, and the Problems tab says which images are missing.
One image in the project, one missing
\includegraphics[width=0.45\linewidth]{figures-plot.png}

\includegraphics[width=0.45\linewidth]{figures/missing.png}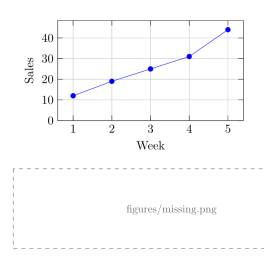
Problems tab: Images not in the project: figures/missing.png
Your own .sty and .cls files
A project can hold its own .sty and .cls files: they are kept, saved to Drive and exported with the project. The preview does not read them yet, though. A \usepackage{mymacros} that names your own file is reported in the Problems tab as a package that is not available, and the commands defined in it are skipped.
Until that changes, copy the \newcommand and \newenvironment lines you need from your .sty file into the preamble of the main file. They work there, and the document still compiles in a TeX installation.
Definitions from a .sty file, moved into the preamble
\documentclass{article}
% from mymacros.sty
\newcommand{\project}{River Survey}
\newcommand{\unit}[1]{\,\mathrm{#1}}
\begin{document}
The \project{} measured a flow of $44\unit{m^3/s}$.
\end{document}
What differs from a TeX installation
Questions and answers
How do I import an Overleaf project?
In Overleaf, open the menu and download the project source as a .zip. In Scissor LaTeX choose New project, then Open .tex or .zip files, and pick the .zip. The folders and files are kept.
Where are my projects stored?
In your browser's storage on this device. They stay there until you delete them or clear your browser data. Save a copy to Google Drive or export a .zip to keep a backup.
Can I use my own .sty file?
Not yet in the preview. The file is kept in the project, but its definitions are not read. Copy the \newcommand lines you need into the preamble of the main file.
Every example on this page is typeset by Scissor LaTeX when the site is built. Last updated 2026-11-06.